Explore our comprehensive Exercises page at Body Mechanix, designed to guide you through effective workouts tailored to enhance strength, flexibility, and overall fitness. Whether you’re a beginner or a fitness enthusiast, find routines suited to your goals and lifestyle to keep you active and healthy.
Abdominal Exercises
Wall Station Abdominal Curl-Up
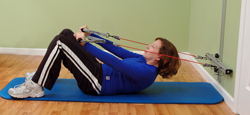
Origin: Lower Cross Bar
Attachment: 2 Handles
Movement: Lift shoulders off the mat
Wall Station Abdominal Oblique Curl-Up
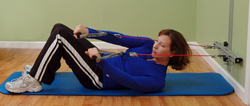
Origin: Lower Cross Bar
Attachment: 2 Handles
Movement: Lift one shoulder, slightly rotating trunk
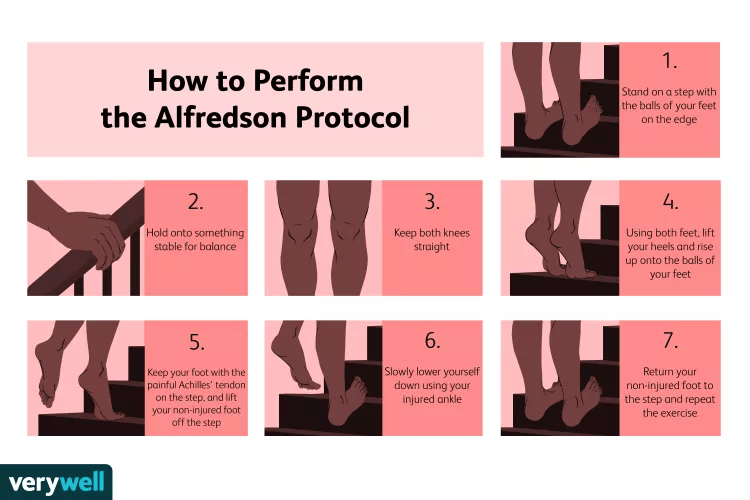
Alfredson Protocol
Alfredson Protocol for Achilles Tendonitis
Achilles tendinopathy strengthening exercise.
This should be consulted with a physio or podiatrist prior to exercise as this might not be suitable for everyone.
Ankle Exercises
Ankle and Core Stability Exercises
Basic balancing exercises for ankle and core instability
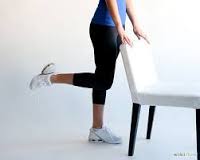
Sit-to-stands:
Stand in front of a chair with your feet hip-width apart. Slowly bend your knees to sit back on the chair as steadily and gently as possible. Take a short pause and stand straight up without using your arms – you want to rely on your core and legs to stand up. Repeat this process 10 times. If you need some balance assistance, use a wall or something else to guide you up and down until you are strong enough to do this exercise on your own.
Single-leg stands:
Stand with your feet hip-width apart. If you need assistance, stand near a wall or have something near you that you can hold onto while balancing. Lift one foot an inch or two off the ground and stand straight for 10-15 seconds. Put your foot down and repeat the process with your other leg until you’ve done five rounds with each foot.
Standing marches:
Stand straight with your feet hip-width apart. Lift one leg until your knee is as close to a 90-degree angle to the ground as you can get, pause, and slowly bring your foot back down. Repeat the process with your other leg until you perform 20 marches. Like other exercises, start with a wall or other balance assistance until you feel strong enough to do standing marches on your own.
Over-the-shoulder walks:
Begin at the end of a hallway or another clear path. Make sure nothing is in your way before looking behind you over one of your shoulders. While looking back, take five steps forward, stop, and take another five steps while looking back over your other shoulder. Reset and repeat this process five times.
Wall Station Ankle Plantarflexion
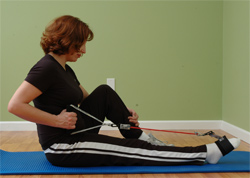
Origin: Lower Vertical
Attachment: Extremity Strap
Movement: Stabilize with handle while pushing
Wall Station Ankle Dorsiflexion
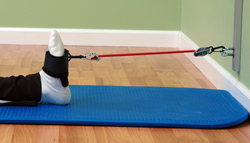
Origin: Lower Vertical
Attachment: Extremity Strap
Movement: Move ankle toward head
Wall Station Ankle Inversion
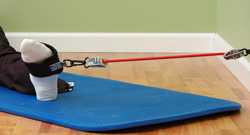
Origin: Lower Vertical
Attachment: Extremity Strap
Movement: Turn ankle inward
Breathing Exercises
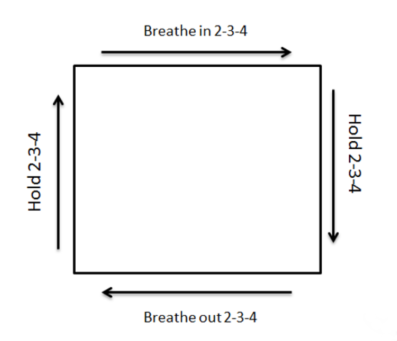
Box Breathing
Box Breathing:
- Breathe in through your nose for four seconds.
- Hold for 4 seconds.
- Breathe out of your mouth for 4 seconds.
- Hold for 4 seconds.
- Repeat as instructed by the practitioner
Relieving Positions:
- Sitting at a desk/table, with your head supported by pillows on the table.
- Standing, bracing arms on the table.
- Standing, bracing arms on knees.
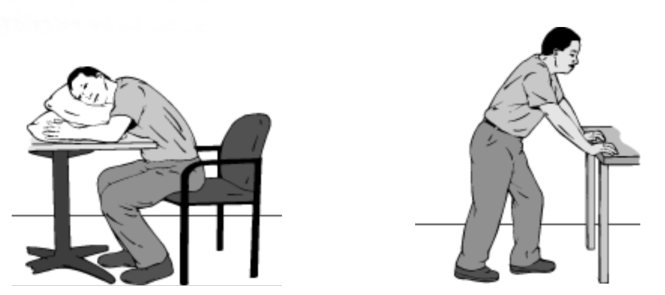
Remember to let your stomach rise gently on inhalation.
Bridges & Straight Leg Raise Exercises
Bridges & Straight Leg Raise
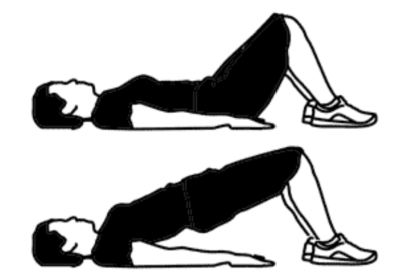
Bridges:
- Lie on your back with your knees bent.
- Tighten your stomach and buttock muscles.
- Keeping these muscles tight, lift your hips up off the floor until they are in line with your knees.
- Hold for 5 seconds.
- Lower slowly, rolling from the top of your spine down to the bottom.
- Repeat as instructed by the practitioner.
Straight Leg Raise:
- Lie on your back with your legs out straight.
- Tighten your stomach and buttock muscles.
- Keeping muscles tight, lift one leg up off the bed.
- Hold for 5 seconds.
- Lower slowly, and lift the alternate leg, keeping those muscles tight.
- Repeat at practitioner’s instructions.
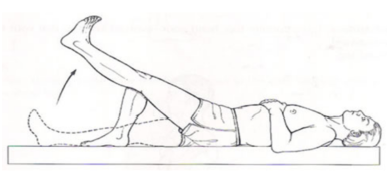
To make it harder, do both legs at the same time.
Calf Exercises
Calf Raises
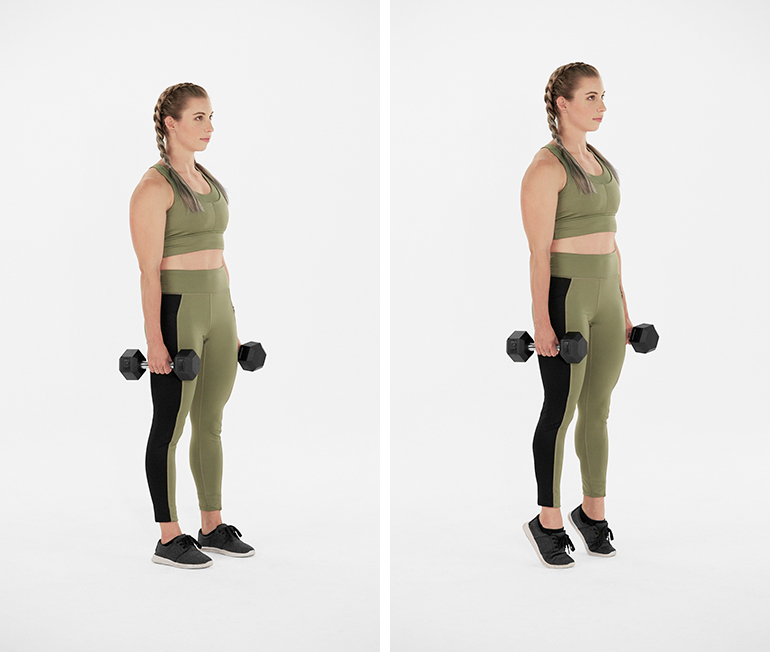
Stand with feet hip-width apart.
Rise up onto tiptoes, then slowly lower.
Repeat at practitioner’s instructions.
If needed, hold on to a table for support. To make it harder, do it on one leg.
(dumbbells optional)
Single Leg Stand
Practice standing on one leg
Use a table/bench for support if needed.
To make it harder, stand on something soft (pillow, cushion, towel).
Repeat at practitioner’s instructions.
Calf Stretches
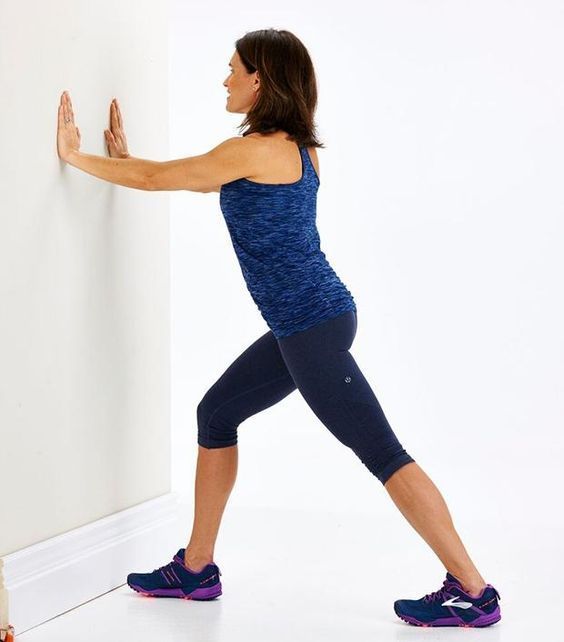
The calf stretch is a fantastic exercise to loosen up the calf muscle and reduce heel pain.
- Start standing facing a wall with both feet shoulder-width apart.
- Place one foot in front of the other and lean into the wall, with the front leg bent and the back leg straight.
- Hold for 30 seconds and repeat on the other leg. Do this exercise twice a day whilst brushing your teeth, so that you always remember to do it.
Legs Exercises
Glute Sequence
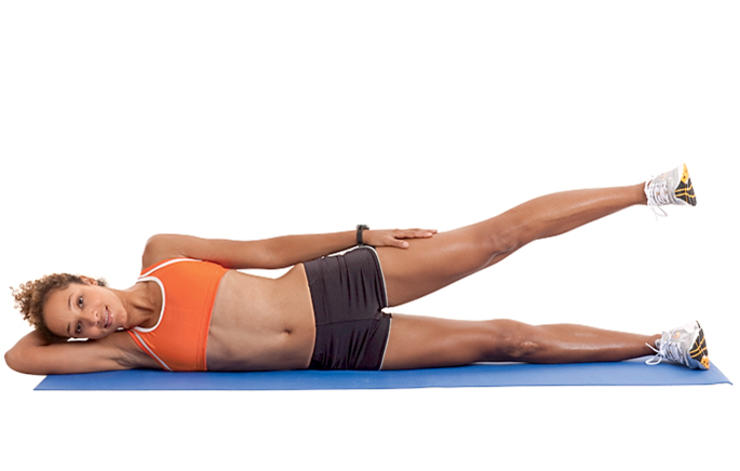
- Lie on your side with legs on top of each other and out straight.
- Lift the top leg up about one foot (this is the starting position).
- Pulse your leg up 10 times.
- Pulse leg backwards 10 times.
- Pulse leg forwards 10 times.
- Trace a clockwise circle with your foot 10 times.
- Trace the anti-clockwise circle with your foot 10 times.
Remember to keep your heel higher than your toes, and don’t put your leg down between different movements.
Repeat at practitioner’s instructions.
Lumbar Exercises
Lumbar Rotation Stretches
Lumbar Rotation Stretch
- Lie on the back with knees bent and arms outstretched.
- Roll your knees to one side as far as you can comfortably.
- Hold for 10 seconds.
- Roll your knees to the other side, and hold for 20 seconds.
- Repeat at practitioner’s instructions.
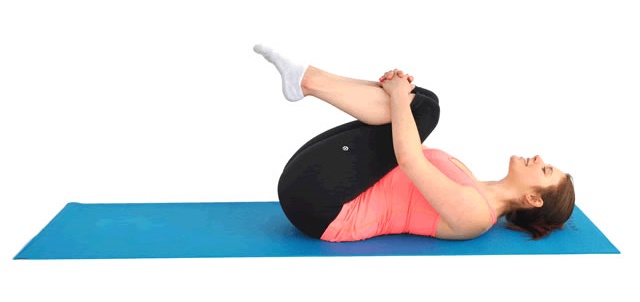
Knee Hugs
Knee Hugs
- Lie on the back.
- hug one or both knees to your chest (do whatever is comfortable)
- Hold for 20 seconds.
- Do the opposite leg if necessary.
- Repeat at practitioner’s instructions.
Obie Roller Exercises
Upper Body Stretching Exercises
Back Extension
Keeping the back relaxed as much as possible, use the arms to press up into an extension stretch. Hold for 5-10 seconds or until you feel it stretching.
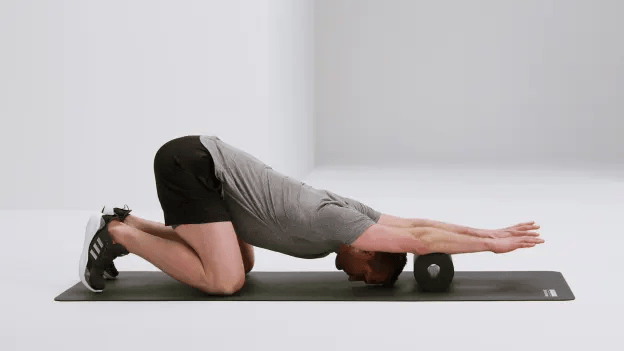
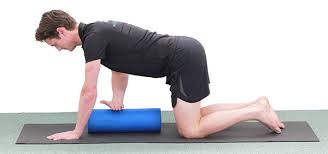
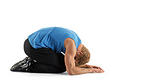
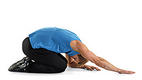
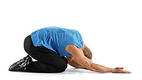
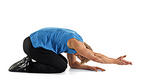
Bow Stretch
Kneel in front of your foam roller, extend your arms onto the roller and push down from your shoulders. Keep your head down.
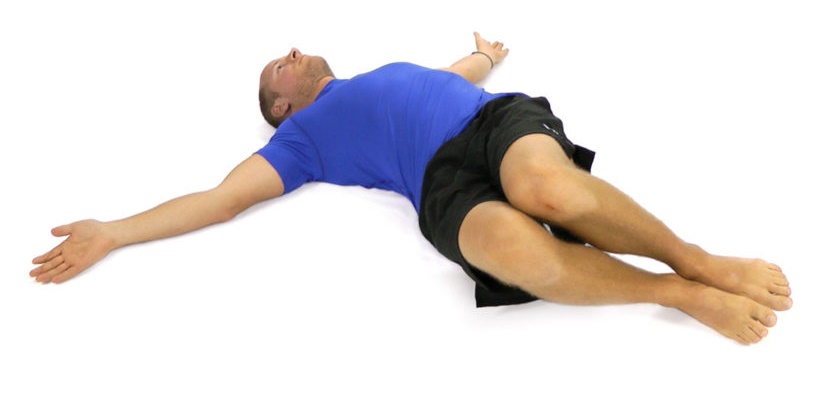
Pectoral Stretch
( Great for golfers and anyone using the upper body in exercises)
Lie lengthways on your roller and hold your arms out at 90 degrees from your body. From this position, the fingers and hands should be comfortable. Only hold this stretch for 30-40 seconds at a time to prevent the fingers from going numb and tingly.
Thoracic Stretch
Kneel on all fours, with the foam roller lying underneath you. Put the opposite hand on the roller, reaching underneath your body. Roll the roller away from you, twisting your upper torso under.
Upper Body Massaging Exercises
Thoracic Roll
(get rid of knots in your back)
Lie with the roller under your shoulders. Lift the bottom off the ground and tuck your feet in so your legs are at a 45-degree angle. Keeping your head facing up and hands behind your head, push from your feet to roll your shoulders back and forth across the roller. You’ll feel it gently massage the muscles in your back. Don’t go past your waist.
Lats
(to release the lats and outside of the shoulder blade)
Lie with the roller under one arm with that arm above your head. Roll from your under arm down to your waist. Repeat on the other side.
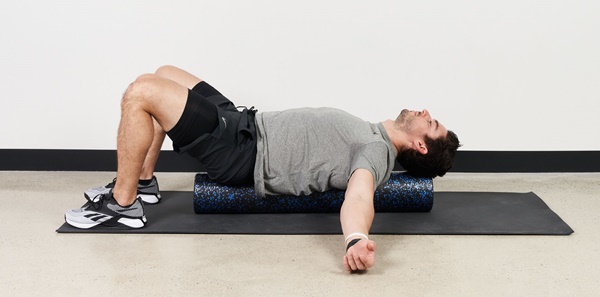
Shoulder Release
Lie on the roller as you would for spine-neutral relaxation. Raise both hands above your head and hold for 20-30 seconds.
Lower Body Strengthening Exercises
Some of these exercises require you to hold your body off the ground using your arms and this can be quite tiring. You will build upper body strength from doing so, but if you get too sore, stop and take a break – DO NOT continue if it feels uncomfortable or if you are in pain.
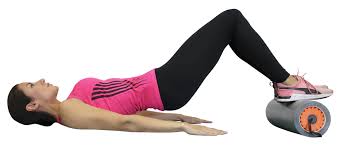
Hamstring
(to increase flexibility)
Lie on your back as shown with a roller under your hips. Raise one leg and extend the knee until a stretch is felt in the hamstring. Pump the foot up and down to increase the stretch.
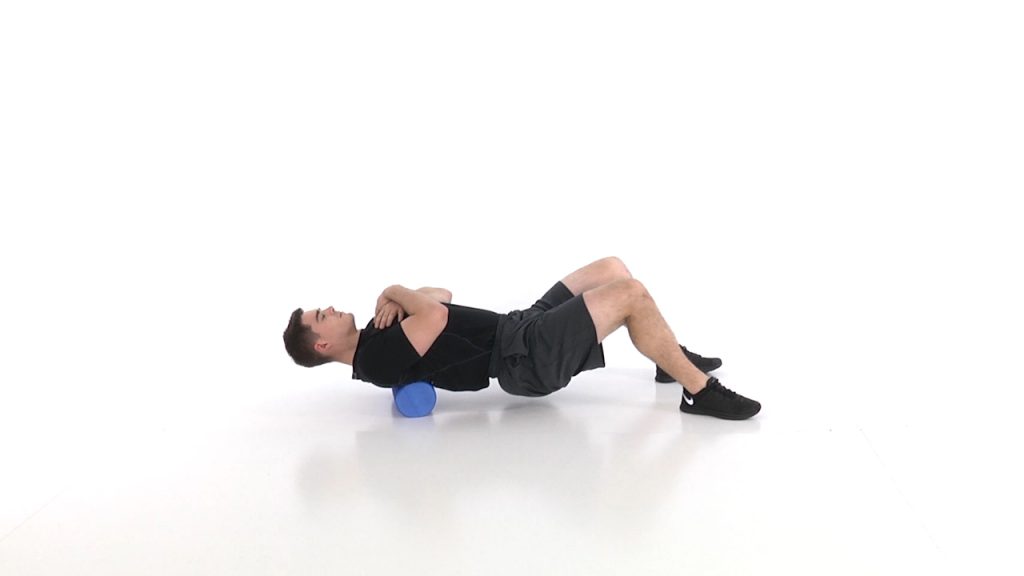
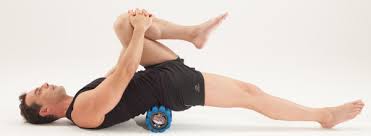
Hip Flexor
Lying on the roller as pictured, pull knee to stretch and let the other leg relax. Hold the stretch for 30-40 seconds per side.
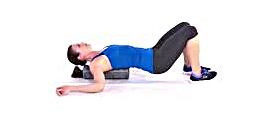
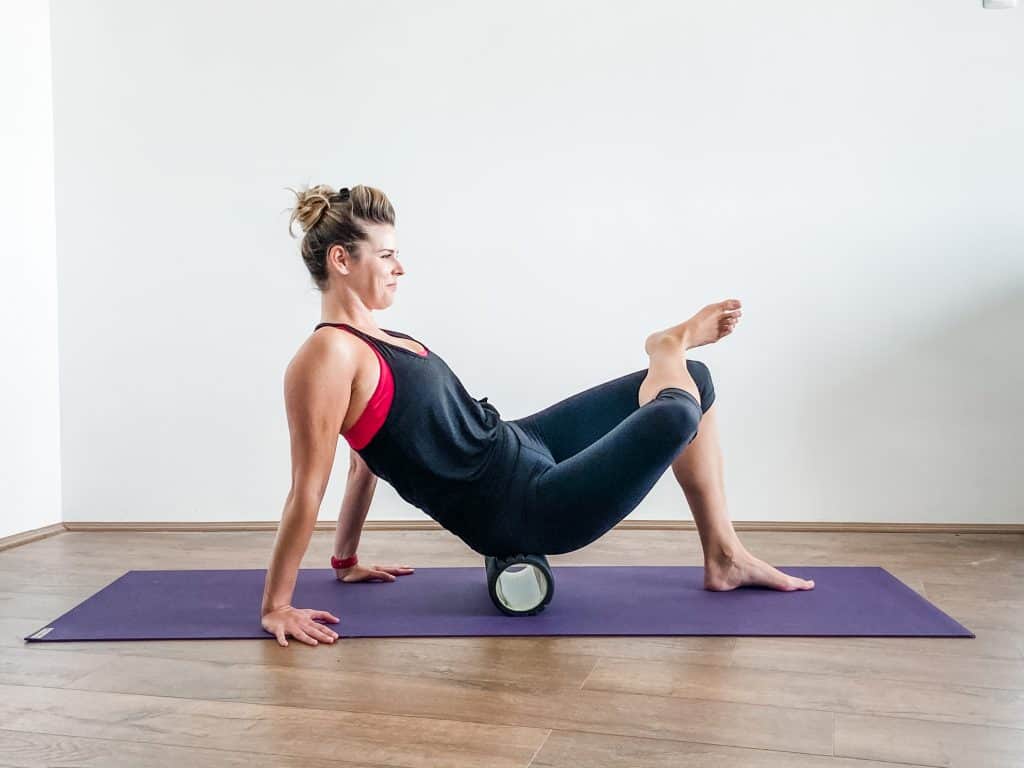
Glut Strengthening Exercise
From flat on the floor with roller under feet, squeeze gluts together and then lift. Hold for 2-3 seconds and slowly lower. Breathe out as you rise, rest and breathe out again as you lower.
Lower Body Massaging Exercises
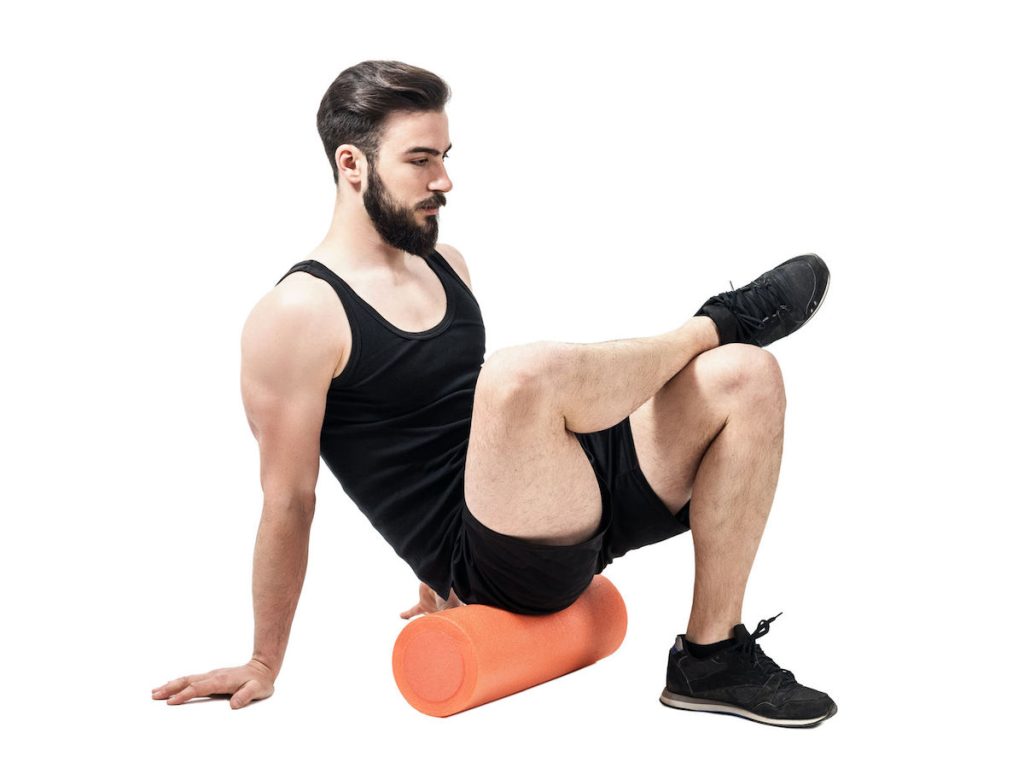
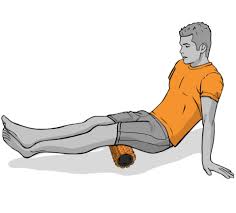
Calf
(give your calves an effective massage)
Sit on the floor with the roller below your calves. Cross one leg over the other with your foot resting on the other foot. Using your arms, raise your body up and roll along the length of your calves, from knee to ankle. For massage of your Soleus (short calf muscle) focus on the lower calf.
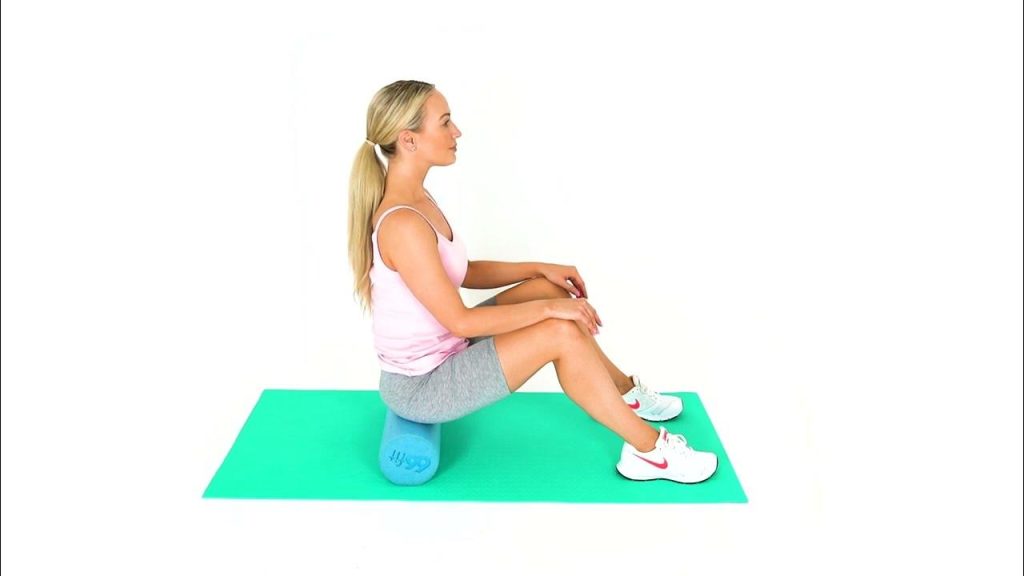
Gluteal Release
Cross one leg over the other and roll from glut down into the sit bone. Rotate from side to side to find the tight spots.
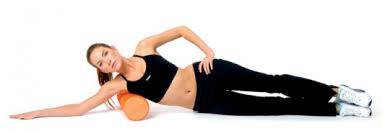
ITB
(iliotibial band)
Lie on the roller just below your hip so it is 90 degrees to your body. Keeping your elbow on the floor, cross your topmost leg over the other leg and use your foot to gently roll up and down the outside of your leg.
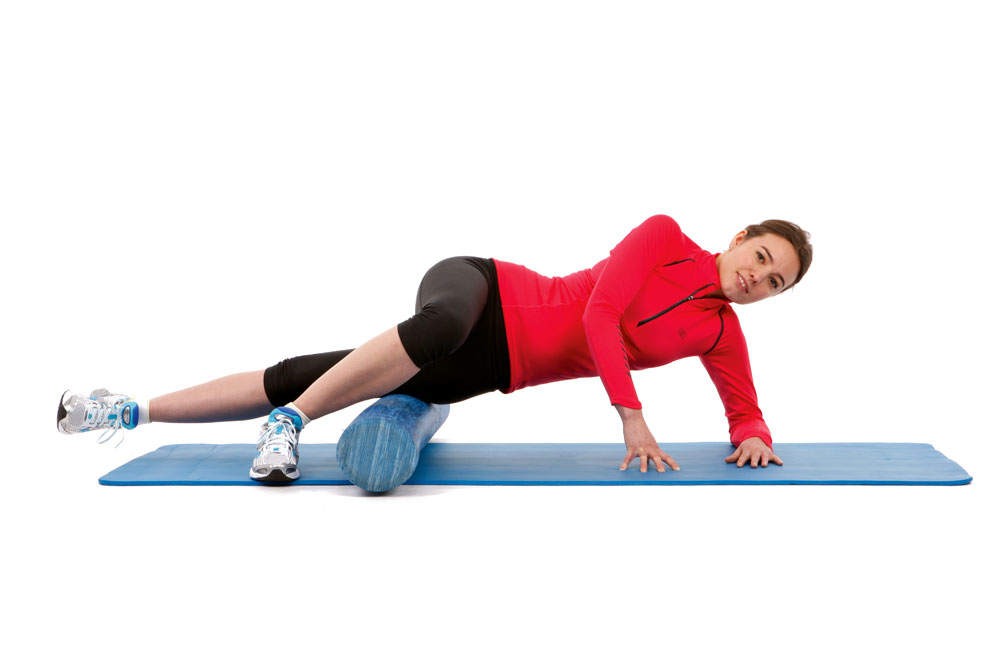
Adductor
Lie on the ground on your side with the roller parallel to you. Put your topmost leg over the roller and transfer your weight onto the roller, using your hips to roll your body back and forth along your adductor muscles.
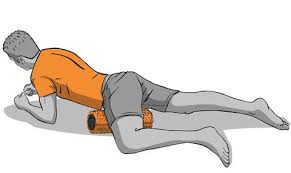
Quads
Lie on the roller with it just below your hips. Keep your legs straight out behind you. Using your elbows on the floor, roll yourself back and forwards to massage the length of your quads.
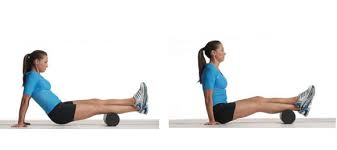
Hamstrings
Sit on the floor with the roller underneath your hamstrings. Lift yourself off the ground with your hands and using your arms, push yourself back and forward along the rollers to release tension in your hamstrings.
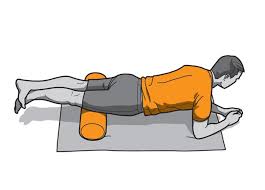
Hip Flexor
Lie on the roller with it just below your hips. Keep your knees apart and raise your ankles into the air with your heels touching. Using your elbows on the floor, roll yourself back and forwards so it massages the topmost part of your quad (hip flexors).

Flexion
Sit on the roller and push with your feet so the roller moves over your sit bone. Roll back into the original position and pause on areas of tenderness.
Plantar Fasciopathy Exercises
Plantar Heel/Foot Pain Exercises
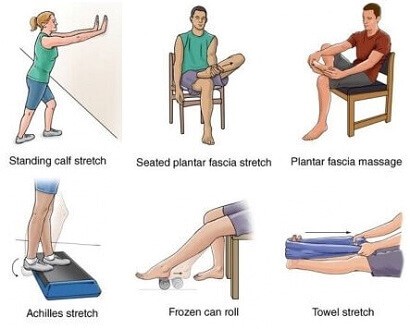
Standing calf stretch Stand with your hands on a wall for support and your feet pointing straight ahead. Shift your weight forward while keeping your back heel on the ground.
Plantar fascia stretch and massage Sit on a chair and place the painful foot on the knee of your other leg, outer ankle bone facing down. Pull the toes of the painful foot toward your shin with your hand until you feel a stretch. Hold up to 10 seconds while slowly massaging up and down the sole of your foot with the knuckles of your other hand, applying slight pressure as you do so. You should feel the tissue tense.
Achilles stretch Stand on the bottom step of a staircase with the balls of your feet on the step. Hold onto a handrail or wall for balance. Slowly lower your heels over the edge of the step until you feel a stretch in your calf. Hold for 15 seconds, then tighten your calf to bring your heel back up. Repeat 3 times
Spikey ball or frozen can massage Stand with your foot on the ball or can and slowly roll it up and down your foot. You can increase the intensity by putting more weight on the ball.
Towel stretch Sit on the floor with your affected leg straight out in front of you.
Place a towel around the ball of your foot. Hold one end of the towel in each hand.
Gently pull the towel toward you until you feel a stretch in your calf.
Posture Exercises
Posture Exercises

Posture:
- Stand with back straight and feet shoulder-width apart.
- Hold hands with palms facing forwards down by sides.
- Gently squeeze shoulder blades together.
- Tuck chin in, and gently pull belly button into the spine.
- Maintaining this position, look to the left.
- Come back to a central position.
- Maintaining position, look to the right
- Repeat the practitioner’s instructions.
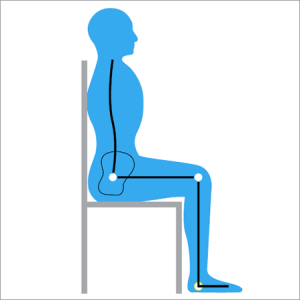
Sitting Posture:
- Keep shoulders back and down; as if you are trying to fit each shoulder blade into the opposite hip pocket.
- Stand up tall; as if someone is pulling you up by your ears.
- Tuck your chin in.
Benefits
- Better Breathing; good posture helps your lungs to work optimally.
- Reduced back and neck pain.
- Increased concentration; good posture optimises oxygen delivery to the brain, as circulation of blood to the brain is unimpeded.
- Optimises function of organs.
Shoulder & Core Exercises
Shoulder Exercises
Prone extension
- Lie on your belly, hand under your forehead
- Breathe deep into your belly and lower back
- Draw shoulder blades down and “wrap around ribcage”- you can push gently into elbows
- Visualize being pulled by a piece of string on top of the head- “long spine”
- Keep chin tucked in and slowly lift the neck, lift from the mid back rather than lower back
Wall plank
- Forearms on the wall, hands spread out
- “long spine”
- Shoulder blades down and “wrapped around ribcage”
- Slide one arm up and down the wall while stabilizing with the other arm
Wall plank with rotation
As per the wall plank, this time rotate the body away from the fixed arm, the point of rotation shoulder be the shoulder joint.
Reach Roll and Lift
Kneel down and allow back to round.
Slid arm forward until arm straight.
Rotate your arm so that it’s facing up.
Raise your right arm and hold.
Repeat the practitioner’s instructions
Thoracic rotation with reach
Rib rolling
- Lie on your side with hips stacked and top knee on top of the roller or large
- Pillow under neck
- Press the top tight into the pillow/roller gently
- Slide the top hand under the ribcage
- Breathe in and as you breathe out rotate your ribcage (use your hand to help stretch)
- Repeat x 10 on each side
Core Exercises
Rolling
Tips
- Lead movement with the head
- Give yourself an object to reach for
- Use a rolled-up towel/blanket to chalk up one side if you are unable to do
- Do no more than x5 repetitions each way, aim to do twice a day
WATCH A VIDEO HERE (Rolling Upper Body)
WATCH A VIDEO HERE (Rolling Lower Body)
90/90 breathing with core activation
- Feet up on a chair
- Breathe into the belly and lower back
- Gently draw in lower abdominals (20%) and hold while continue breathing
- Hold for ______ breaths (as advised by practitioner)
PROGRESSIONS
- Push hands into the wall over your head, wrap shoulder blades around the ribcage
- Take away the chair and keep the legs in a 90/90 position
- Lower one leg slowly from the 90/90 position
Hip Exercises
Cook hip lift
- Lie on your back with knees bent up
- Pull one knee tightly to the chest. To make sure that the knee stays tightly against the chest place a tennis ball just under the bottom rib so that the thigh must pin the tennis ball in place.
- The opposite knee stays bent at 90 degrees and the foot stays planted on the floor
- Push that foot into the floor at the heel and extend the hips upward. Do not allow the tennis ball to fall out of place. You should feel a very good isolation and contraction of the glutes.
Hip Bridge
- Lying on your back with knees up
- Lift up hips, only until the body is in a straight line, do not overextend and do not overgrip buttocks
- Lower down slowly

Modified Side Bridge
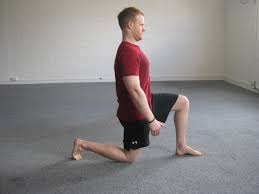
Half Kneeling
- Arms relaxed by the side
- The rearfoot should be flat (not like in the image)
- Pelvis level
- The body should be relaxed
Squats and Clams Exercises
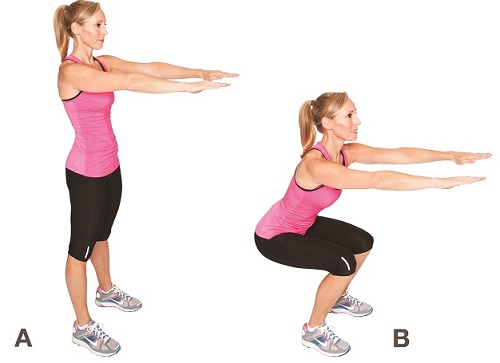
Squats
- Stand with feet hip-width apart.
- Stretch your arms straight out in front of you.
- Squat down, keeping your back straight, looking straight ahead and keeping your shoulder back. Imagine you are sitting back on something far away.
- Repeat the practitioner’s instructions.
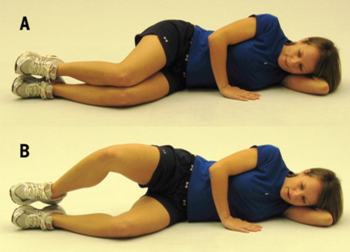
Clams
- Lie on the side with knees bent.
- Tighten stomach and buttock muscles.
- Keep muscles tight and ankles together, and lift knees apart.
- Hold five seconds, lower and repeat.
- Repeat the practitioner’s instructions
Superman and Cat/Camel Exercises
Superman
- The starting position is on hands and knees.
- Tighten stomach and buttock muscles
- Keeping these muscles tight, lift and straighten opposite arm and leg, trying to keep back as still as possible.
- Alternate sides.
- Repeat the practitioner’s instructions
Cat and Camel
- Start in the hands and knees position.
- Gently tighten stomach and buttock muscles.
- Keeping these muscles tight, arch back up as high as it will go comfortably.
- Still maintaining muscle tightness, drop back towards the ground as low as it will go comfortably.
- Alternate these two movements.
- Follow the practitioner’s instructions.

Swiss Ball Beginner Exercises
Pro Series Exercise Ball Push Up on Wall
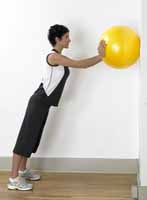
Begin by stabilizing ball on wall with both hands near shoulder level. Slowly lower body toward wall by bending elbows, keeping ball steady. Keep pelvis and neck in neutral, maintaining alignment of the trunk and legs. Hold and slowly return.
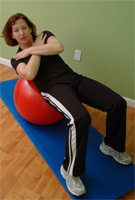
Pro Series Exercise Ball Sitting Knee Extension
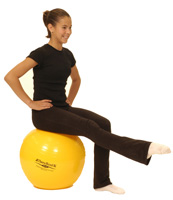
Sit on the ball with your back in a neutral position. Tighten the abdominals while extending the knee. Return and repeat on the other side. Keep the ball stable.
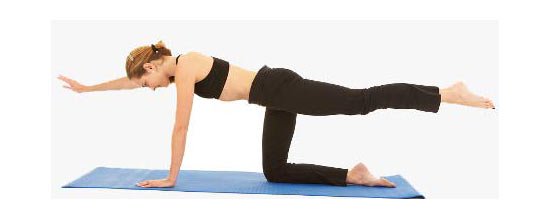
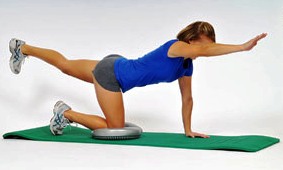
Pro Series Exercise Ball Sitting Arm & Leg

Sit on ball with pelvis and neck in neutral. Lift arm and opposite leg, keeping them straight. Alternate with opposite arm and leg and repeat. Don’t allow ball to move.
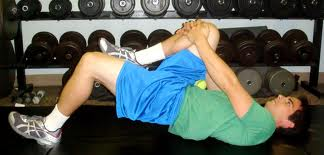
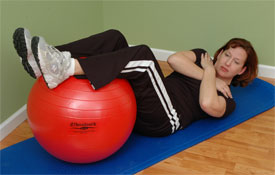
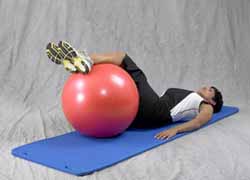
Pro Series Exercise Ball Abdominal Curl Up in Supine

Lay on on the floor with the ball positioned in the small of your feet. Keep your knees bent to 90 degrees. Cross your arms over your chest and lift your trunk upward until your shoulder blades come up off the floor. Hold and slowly return.
TIP: Don’t let the ball move under your feet.
VARIATION: Change the position of your hands to behind the head to increase the challenge.
Pro Series Exercise Ball Abdominal Oblique Curl Up in Supine
Lay on the floor with the ball positioned in the small of your feet. Keep your knees bent to 90 degrees. Cross your arms over your chest. Lift one shoulder and trunk upward, slightly twisting your trunk. Hold and slowly return.
TIP: Don’t let the ball move under your feet.
VARIATION: Change the position of your hands to behind the head to increase the challenge.
Pro Series Exercise Ball Front Squat

Stand with your exercise ball in your outstretched arms. Place your feet a shoulder-width apart. Squat down by bending your hips and knees while keeping your back straight. Hold and slowly return.
VARIATION: Perform squat on one leg.
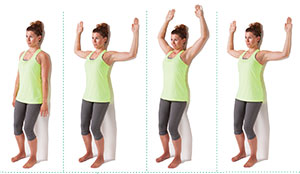
Pro Series Exercise Ball Sitting Shoulder Flexion
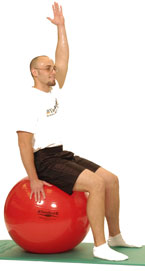
Sit on ball with back in neutral position. Tighten abdominals while lifting arm overhead. Return and repeat on other side. Keep ball stable.
Pro Series Exercise Ball Wall Squat
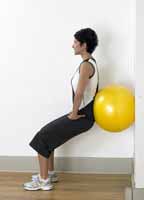
Begin with ball behind your back and stabilized on wall. Keep neck and pelvis in neutral. Perform a squat by bending knees, lowering pelvis and rolling ball downward. Hold and slowly return.
Pro Series Exercise Ball Hip Extension

Lay on ball with back in neutral position. Stabilize with arms and slowly lift one leg, keeping the knee extended. Hold and slowly return; repeat on other side. Don’t lift leg past neutral position. Keep ball steady.
Pro Series Exercise Ball Lower Trunk Rotation
Lay on your back with the ball under your knees. Keeping your upper body on the mat, gently roll your legs to one side, rotating your hips. Keep your knees and feet together. Hold at the end range and slowly return in the opposite direction.
Swiss Ball Advanced Exercises
Pro Series Exercise Ball Abdominal Oblique Curl Up in Bridge
Lay on the ball in a bridge position with both feet on the ground, and the ball positioned in the small of your back. Keep your knees bent to 90 degrees, and your hips extended. Cross your arms over your chest and lift your trunk and one shoulder upward until your abdominals contract. Keep your back on the ball while you twist. Hold and slowly return.
TIP: Don’t let the ball move under your back.
VARIATION: Change the position of your hands to behind the head to increase the challenge
Pro Series Exercise Ball Abdominal Curl Up

Place the ball under the small of your back in the bridge position with knees at 90 degrees. Lift your trunk upward, contracting your abdominals. Keep your pelvis in neutral. Do not allow the ball to move. Alter hand positions to change the challenge of the exercise.
Pro Series Exercise Ball Bridge with Alternating Arms

Lay with ball under back and knees bent at 90 degrees. Alternate lifting arms, keeping them straight. Keep pelvis and neck in neutral. Don’t allow ball to move. Don’t allow pelvis to drop.
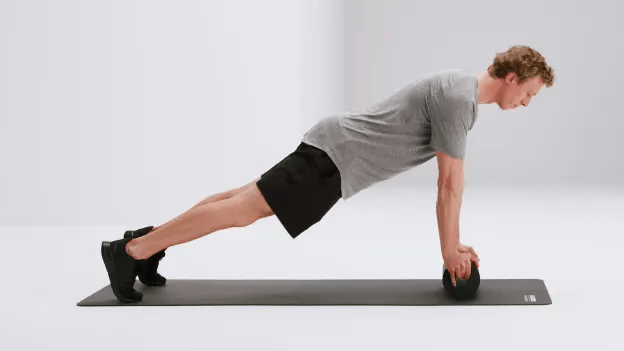
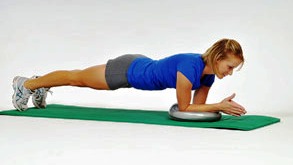
Pro Series Exercise Ball Prone Walk Out

Begin with ball under hips. Walk hands out to a push-up position, ending with ball under shins. Keep pelvis and neck in neutral position; maintain trunk and legs in a straight line throughout the exercise. Slowly walk hands back and repeat.
Pro Series Exercise Ball Superman

Lay with the ball under your stomach. Stabilize with your feet and lift your trunk. Extend your arms forward in a straight line with your body. Keep your pelvis neutral, and do not hyperextend your back. Hold and slowly return. Don’t allow the ball to move.
Pro Series Exercise Ball Push Up on Floor

Begin with in push-up position with ball under shins. Keep pelvis and neck in neutral position. Bend elbows, slowly lowering trunk to floor. Maintain trunk and legs in a straight line throughout the exercise. Slowly return and repeat.
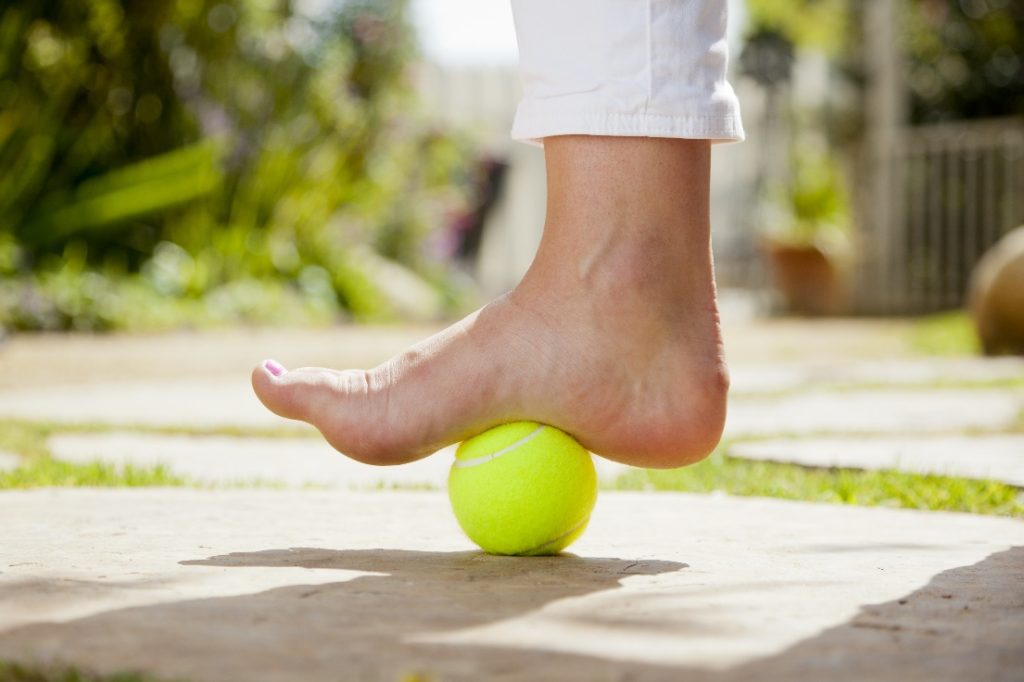
Tennis Ball Exercises
Tennis Ball
The tennis ball exercise is great to loosen up restrictions underneath the bottom of your foot and to also help increase circulation.
- Whilst sitting down roll the ball up and down the whole length of your foot for 60 seconds.
- Then little circles clockwise at the toes, arch and heel for 20 seconds each.
- Do this on both feet as many times of the day as you like to help reduce plantar foot pain.
Thera-band Beginner Exercises
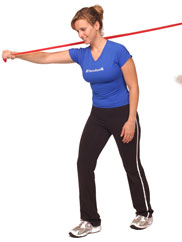
Thera-band Tubing Shoulder Extension

Securely attach the middle of the tubing to a door or sturdy object in front of you. Grasp handle and pull toward from your body, keeping your elbow and wrist straight. Hold and slowly return.
Thera-band Tubing Long Sitting Row

Sit on a mat with legs extended forward. Securely wrap the middle of the tubing around your feet to prevent it from slipping. Grasp the handles with your arms extended in front of you. Pull the tubing toward your hips, bending your elbows. Hold and slowly return. Keep your knees and back straight.
Thera-band Tubing Shoulder External Rotation

Securely attach the middle of the tubing to a door or sturdy object. Place a rolled-up towel under your arm. Bend your elbow at your side and bring your forearm in front of your body. Grasp handle and pull outward, keeping your elbow by your side, and forearm parallel to the ground. Hold and slowly return. Keep your wrist straight.
Thera-band Tubing Shoulder Internal Rotation
Securely attach the middle of the tubing to a door or sturdy object. Place a rolled-up towel under your arm. Bend your elbow at your side. Grasp handle and pull across your body, keeping your elbow by your side, and forearm parallel to the ground. Hold and slowly return. Keep your wrist straight.
Thera-band Tubing Shoulder Serratus Press

Attach one end of the tubing to a door or sturdy object behind you at shoulder level. Grasp the handle with your arm at shoulder level with your elbow straight to start the exercise. Push the handle forward, keeping your elbow and wrist straight. Hold and slowly return.
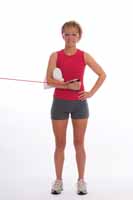
Thera-band Tubing Bent-over Row
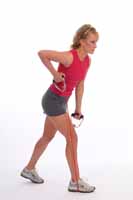
Stand on the middle of the tubing. Slightly stagger your step and lean forward at your hips. Don’t arch your back. Grasp both ends of the tubing with your elbows extended at your side. Pull one end of the tubing upward, bending your elbow. Hold and slowly return. Brace your abdominals and don’t rotate your trunk.
Thera-band Advanced Exercises
Thera-band Tubing PNF D-1 Diagonal Extension
Begin with one end of the tubing secured to a door or secure object above shoulder level. Grasp the handle at your opposite shoulder with your elbow bent. Pull the tubing downward and away from your body. Hold & slowly return. Keep your back straight and your abdominals tight. Follow the motion of your hand with your eyes.
Thera-band Tubing PNF D-2 Diagonal Flexion

Begin with one end of the tubing secured to a door or secure object below waist level. Grasp the handle with your elbow straight, with your hand at the opposite hip. Pull the tubing upward and away from your body. Hold & slowly return. Keep your back straight and your abdominals tight. Follow the motion of your hand with your eyes.
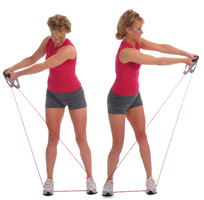
Thera-band Tubing Reverse Fly
Hold one handle in each hand, and grasp tubing about a shoulder-width apart. Extend your arms at shoulder level and keep your elbows straight, stretching the tubing. Hold and slowly return. Keep your head and trunk upright
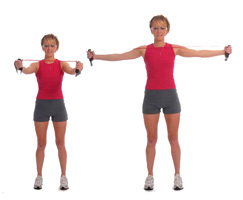
Thera-band Tubing Lateral Raise

Assume a staggered stance position. Stand in the middle of the tubing under your front foot. Grasp the handles and lift your arms outward, keeping your elbows straight and thumbs up. Stop at shoulder level. Hold and slowly return. Keep your shoulder blades down; avoid shrugging your shoulders. Keep your back straight. VARIATION: Lift arms completely overhead for a full range of motion.
Thera-band Tubing Lat Pull Down

Secure the middle of the tubing to a door or sturdy object above shoulder level. Grasp the handles at shoulder level and pull backwards, bending your elbows. Bring your hands to your shoulders. Hold and slowly return. Keep your head and trunk upright.
Thera-band Tubing Functional Pulling

Securely attach the tubing to a door or sturdy object in front of you at waist height. Grasp the handles with elbows bent. Brace your abdominals as you pull the tubing toward you, bending your elbows. Hold and slowly return. Keep your trunk upright, and don’t lean backward or extend your neck to complete the motion.
Thera-band Tubing Functional Baseball Swing
Secure the end of the tubing to a door or secure objects behind you at head-level. Grasp the other handle in your hands as you would grasp a baseball bat. Perform the swinging motion against the resistance of the tubing.
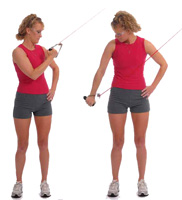
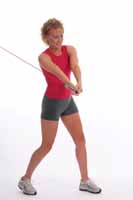
Thera-band Tubing Functional Golf Swing Exercise
Stand on the middle of the tubing with your feet a shoulder-width apart. Grasp both handles together in front of you as you would hold a golf club. Assume the posture that you would address the ball with during your golf swing. Perform the ‘take-away’ against the resistance of the tubing, and then complete the swing and follow-thru.
Thera-band Tubing Diagonal Chopping
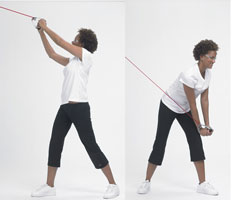
Begin with one end of the tubing secured to the top a door or sturdy object at your side. Take a wide stance and grasp the other end of the tubing above your shoulder by extending and rotating your trunk. Continue to look at the handles as you pull the tubing downward, rotating and bending your trunk, stretching the tubing across your body. Keep your elbows straight. Hold and slowly return.
Thera-band Tubing Diagonal Lifting

Begin with one end of the tubing secured under one foot. Take a wide stance and grasp the other end of the tubing at your knee by bending and rotating your trunk. Continue to look at the handles as you lift your trunk and rotate, stretching the tubing across your body. Keep your elbows straight. Hold and slowly return.
Thera-band Abdominal Oblique Crunch in Supine

Securely attach the ends of the band to a stationary object near the floor. Lay on your back with your knees bent. Extend 1 arm in front and grasp the middle of the loop. Keep elbow straight in front and curl trunk upward toward opposite knee, lifting shoulder blade from floor. Hold and slowly return.
TIP: Keep your elbows straight and be sure to lift shoulder blade off floo
Thera-band Shoulder Bench Press (unilateral) in Standing
Begin with one end of the band or tubing securely attached behind you at shoulder level. Begin in a staggered step position with your back & neck straight. Grasp the end of the band with the elbow bent and palm facing inward. Push the band forward, extending your elbow to shoulder level. Slowly return to the starting position.
TIP: Keep your back and neck straight. Don’t shrug your shoulders. Don’t hold your breath.
Thera-band Trunk Extension (in long sitting)

Sit with legs extended. Stretch the middle of the band around both feet. Grasp both ends of the bands with hands at the chest. Lean back, stretching the band. Keep your lumbar spine straight by extending at the hips. Slowly return.
Prone Plank
Lay face down on the mat with your elbows and forearms on a pad or mat. Be sure your elbows are directly below your shoulders. Lift your body off the floor until your head, hips and knees are in a straight line. Keep your feet and elbows steady. Hold and slowly return.
Quadruped Stabilisation
Get into a hands-and-knees position with one or both knees placed on a padded mat. Alternate lifting your opposite arm and leg while keeping your trunk steady. Hold and slowly return.
Upper Back and Neck Stretches
Upper Back Stretch
- Clasp hands together, and pull them away from your body
- Drop chin towards chest
- Hold for 20 seconds
- Repeat the practtitioner’s instructions

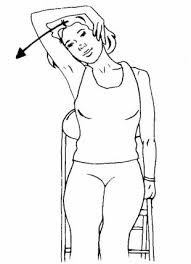
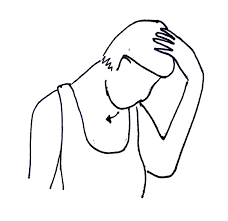
Neck Stretch
- Sit on one of your hands.
- Use your other hand to pull your head over towards your opposite shoulder.
- Hold for 20 seconds
- Repeat the practitioner’s instructions
- Change the angle of your head to target different parts of the muscle.
Wall Angles and Chin Tucks
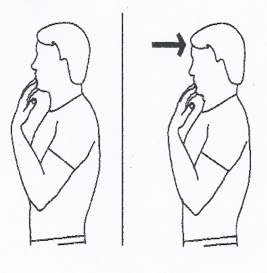
Chin Retraction
- In sitting, standing or lying position, use neck muscles to pull the chin back, as if you are making a double chin.
- Repeat the practitioner’s instructions.
Wall Angles
- Stand with your back to the wall. Bend knees slightly, so the whole back can touch the wall, from the base of the spine to the back of the head.
- Place arms in the position shown below, keeping arms, elbows and hands touching the wall.
- Touch hands together overhead.
- Repeat the practitioner’s instructions.
- To make it easier, do the same exercise lying on the floor.